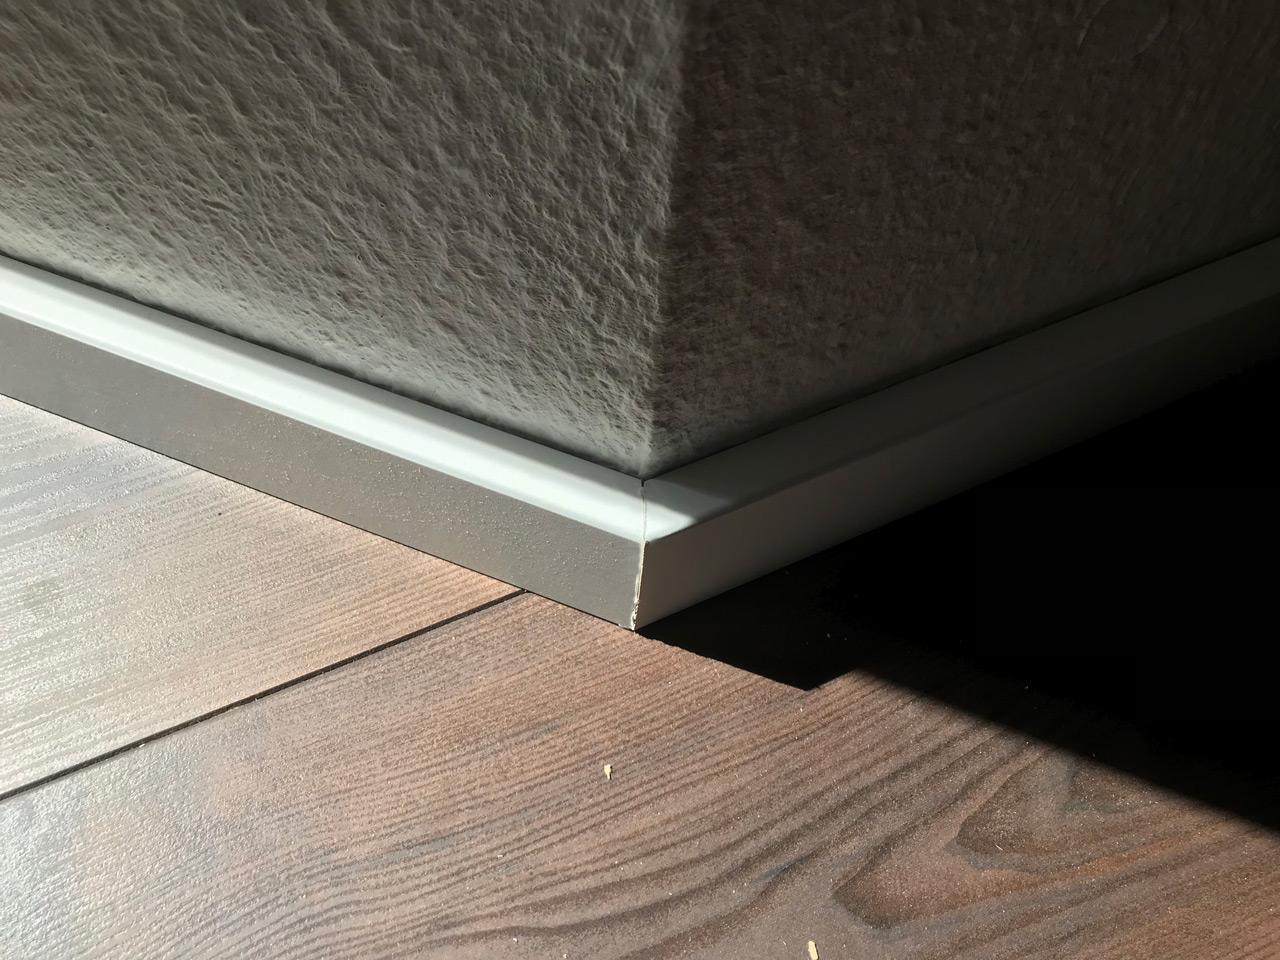
We got wooden flooring in the northern germany refuge recently, and I had to install the baseboards (the mouldings covering the joint of the walls and the adjoining floor) over the last days. Since it’s an older house and not every corner is a perfect ninety-degree-angle, I had to rely on some measuring and precise cutting to make the baseboard joints nice and flush.
I’m not a professional woodworker and I did this for the first time, but with these instructions (that I, in turn, got from an actual professional) I was able to do accomplish the work easily and fairly acceptable. Here are the tools I used and how I did it:
Materials:
– Enough baseboards and assembly adhesive, obviously
– A miter saw
– A sliding bevel
– A tape measure and pen, for marking
Instructions:
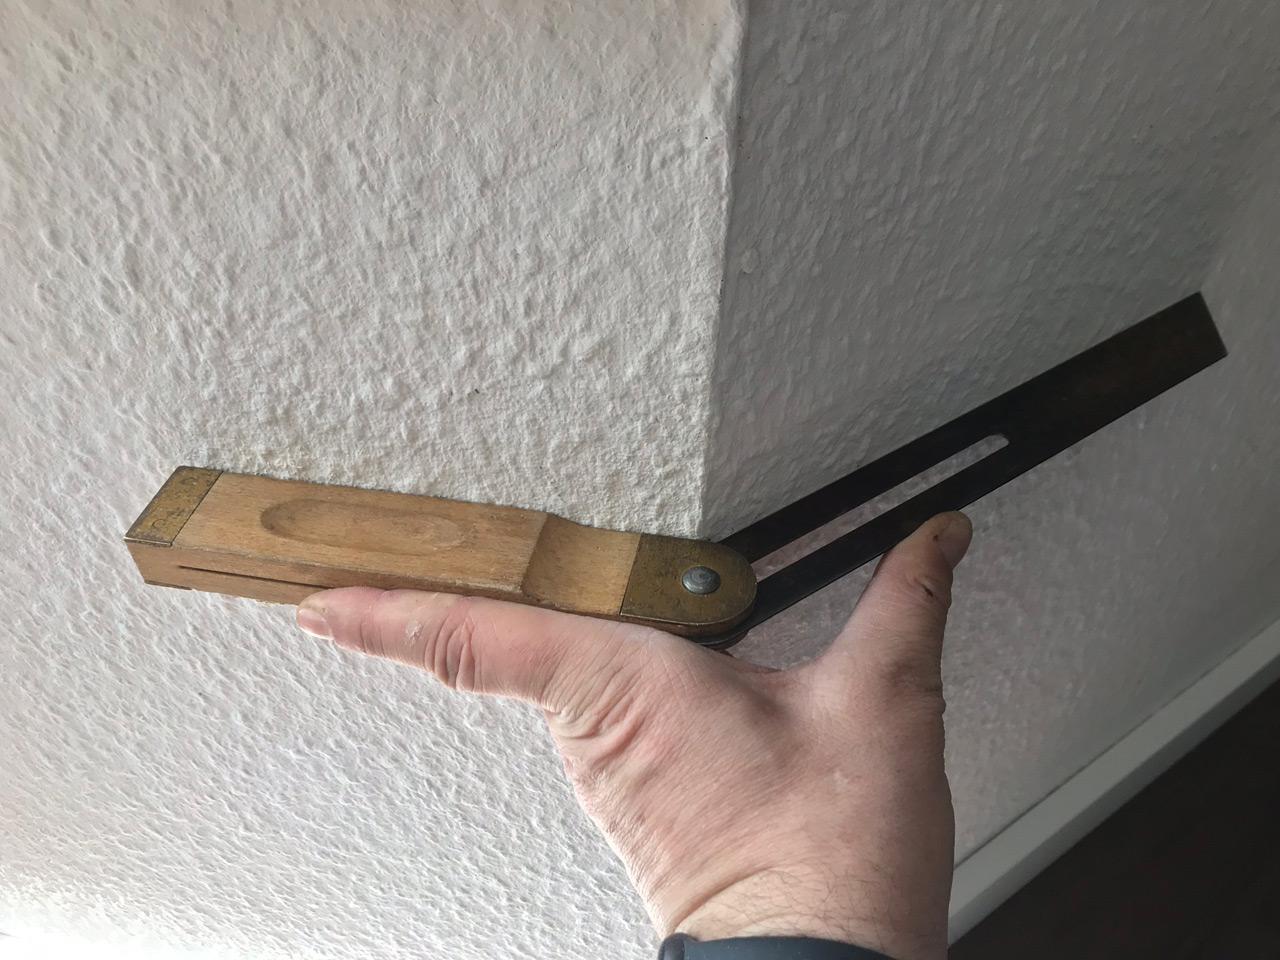 Grab your sliding bevel and retrieve the exact angle of the walls as shown. Fix your bevel.
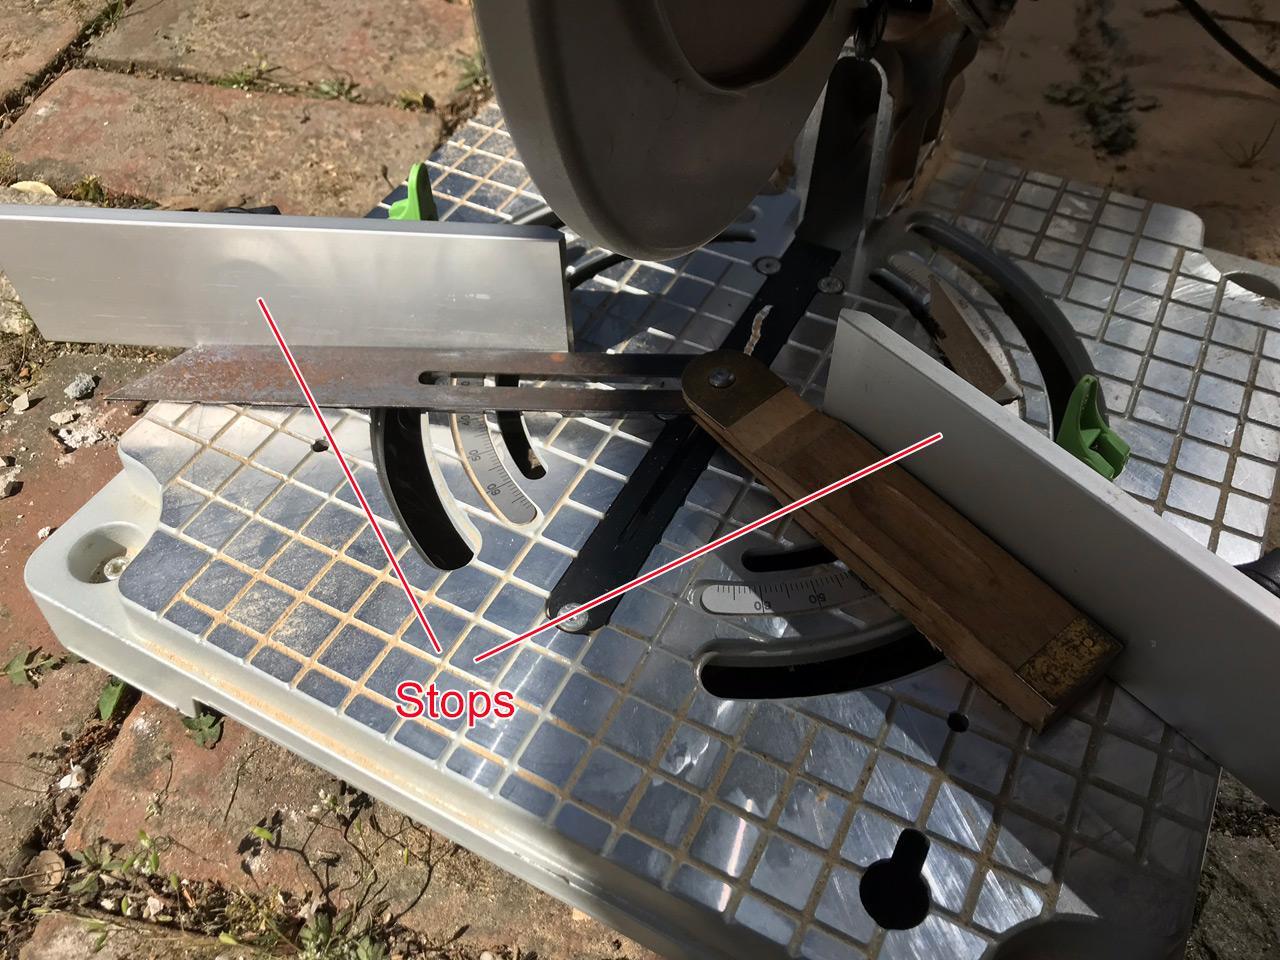 Next, adjust the stops of your miter saw according to the angle you have just determined. Just use your bevel for this.
 Now you’re ready to cut. Adjusting the stops makes absolutely sure you will always end up with the angle bisector of the determined wall angle, thus enabling you to make two absolutely corresponding cuts on two different pieces of wood.
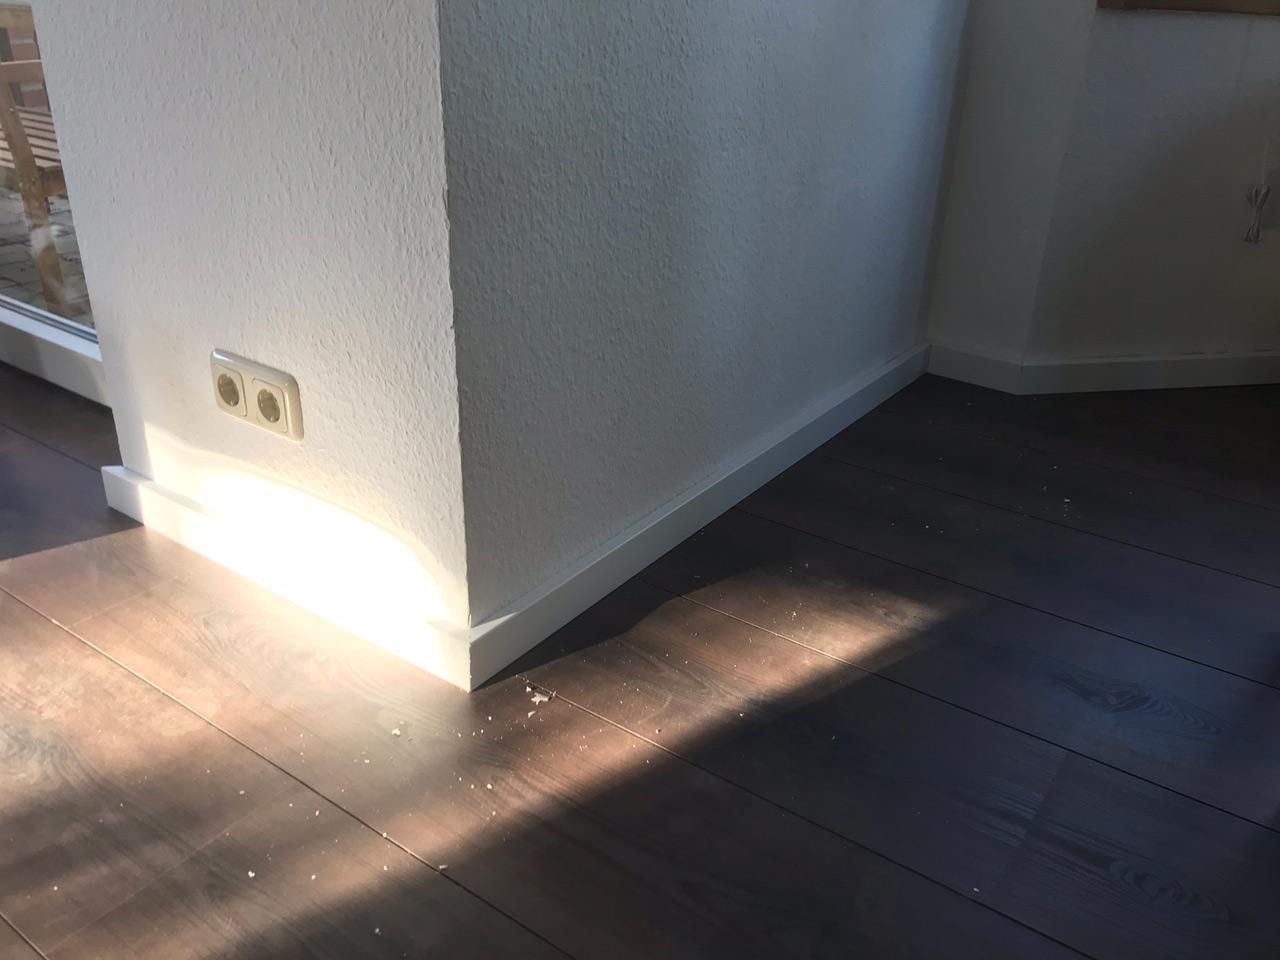 You can now mount the baseboards to the wall (I just glued them on with construction glue). Voilà: perfect joints everytime.
✉ Make contact if you like!