• sl76
    Just another DIY Blog . . .
  • sl74
    Just another DIY Blog . . .
  • sl68
    Just another DIY Blog . . .
  • sl62
    Just another DIY Blog . . .
  • sl40
    Just another DIY Blog . . .
  • sl53
    Just another DIY Blog . . .
  • sl39
    Just another DIY Blog . . .
  • sl2
    Just another DIY Blog . . .
  • sl11
    Just another DIY Blog . . .
  • sl14
    Just another DIY Blog . . .
  • sl73
    Just another DIY Blog . . .
  • sl7
    Just another DIY Blog . . .
  • sl64
    Just another DIY Blog . . .
  • sl46
    Just another DIY Blog . . .
  • sl6
    Just another DIY Blog . . .
  • sl50
    Just another DIY Blog . . .
  • sl49
    Just another DIY Blog . . .
  • sl18
    Just another DIY Blog . . .
  • sl42
    Just another DIY Blog . . .
  • sl24
    Just another DIY Blog . . .
  • sl56
    Just another DIY Blog . . .
  • sl60
    Just another DIY Blog . . .
  • sl91
    Just another DIY Blog . . .
  • sl90
    Just another DIY Blog . . .
  • sl19
    Just another DIY Blog . . .
  • sl26
    Just another DIY Blog . . .
  • sl32
    Just another DIY Blog . . .
  • sl34
    Just another DIY Blog . . .
  • sl41
    Just another DIY Blog . . .
  • sl44
    Just another DIY Blog . . .
  • sl51
    Just another DIY Blog . . .
  • sl55
    Just another DIY Blog . . .
  • sl59
    Just another DIY Blog . . .
  • sl75
    Just another DIY Blog . . .
  • sl66
    Just another DIY Blog . . .
  • sl86
    Just another DIY Blog . . .
  • sl83
    Just another DIY Blog . . .
  • sl81
    Just another DIY Blog . . .
  • sl80
    Just another DIY Blog . . .
  • sl63
    Just another DIY Blog . . .
  • sl61
    Just another DIY Blog . . .
  • sl72
    Just another DIY Blog . . .
  • sl71
    Just another DIY Blog . . .
  • sl70
    Just another DIY Blog . . .
  • sl69
    Just another DIY Blog . . .
  • sl67
    Just another DIY Blog . . .
  • sl65
    Just another DIY Blog . . .
  • sl48
    Just another DIY Blog . . .
  • sl58
    Just another DIY Blog . . .
  • sl57
    Just another DIY Blog . . .
  • sl54
    Just another DIY Blog . . .
  • sl52
    Just another DIY Blog . . .
  • sl47
    Just another DIY Blog . . .
  • sl45
    Just another DIY Blog . . .
  • sl43
    Just another DIY Blog . . .
  • sl38
    Just another DIY Blog . . .
  • sl37
  • sl36
    Just another DIY Blog . . .
  • sl35
    Just another DIY Blog . . .
  • sl33
    Just another DIY Blog . . .
  • sl31
    Just another DIY Blog . . .
  • sl30
    Just another DIY Blog . . .
  • sl29
    Just another DIY Blog . . .
  • sl28
    Just another DIY Blog . . .
  • sl27
    Just another DIY Blog . . .
  • sl23
    Just another DIY Blog . . .
  • sl22
    Just another DIY Blog . . .
  • sl21
    Just another DIY Blog . . .
  • sl20
    Just another DIY Blog . . .
  • sl17
    Just another DIY Blog . . .
  • sl16
    Just another DIY Blog . . .
  • sl15
    Just another DIY Blog . . .
  • sl13
    Just another DIY Blog . . .
  • sl12
    Just another DIY Blog . . .
  • sl1
    Just another DIY Blog . . .
  • sl10
    Just another DIY Blog . . .
  • sl9
    Just another DIY Blog . . .
  • sl8
    Just another DIY Blog . . .
  • sl5
    Just another DIY Blog . . .
  • sl4
    Just another DIY Blog . . .
  • sl3
    Just another DIY Blog . . .
  • sl25
    Just another DIY Blog . . .

Category: Fire & BBQ

Wooden BBQ Table, Pt. III – Finished


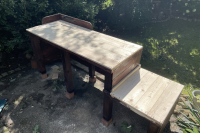
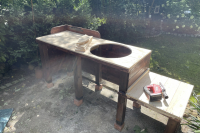
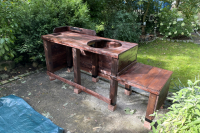
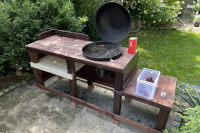
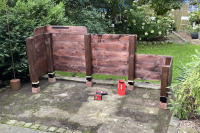
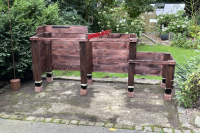
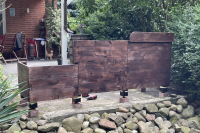
Do – one! The first test took place when it wasn’t even completely finished and I already liked it so much. Enough space to work and mess around, a comfortable height and all the little accommodations I like when having a barbecue. Of course there’s still room for improvement (an LED light, brackets for a sunshade, etc.), but that’s peanuts and there’s no hurry for that 🙂


Wooden BBQ Table, Pt. II

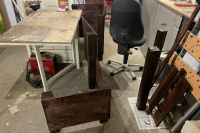
The next steps working on the BBQ-table, although the constant rain and moisture make it hard to proceed decently. I hope it doesn’t simply rot away before it’s finally finished. At the moment I’m pondering on a height adjustment system for the kettle grill. I also discovered my miter saw’s right angle is a bit off, so I’ll have to fix that too somehow 🙁


Wooden BBQ Table, Part I

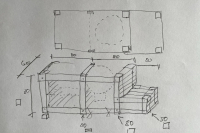
Well, I did much planning and designing for a brick BBQ- and grill table, but let’s be honest, that will be a endeavor for my next life. Top of the list. Just for now, I resorted to good old wood.


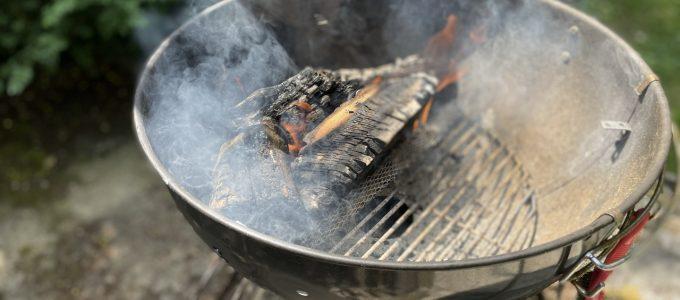
I want real wood to grill with! A firewood grate

Unfortunately, we had to fell five of the many oak trees on our property over the last two and a half years (for various and indeed sensible reasons) – this wood is still stocked here in the garden, drying and waiting for being used worthwile.

Now I read an article from someone that I really deem a “grill master” these days and he stated that solid and reasonable firewood is a more beneficial BBQ fuel than every store-bought coal or briquettes available. Light it up, let it generate glowing embers and use it to grill. So far so good, cooking meat over burning wood is not so much of a recent idea in human history, right? 


White Chili…

 
…on the new pot belly stove, summer 2022. For the recipe click here.


Smoked Char


We got two beautiful chars from our favourite fishmonger and brined (see below) them over night. Then they were “hot smoked” – a fast and delicious cooking method, but not suitable for long-term preservation.

Hot smoke for about 30++ minutes (depending on the size of your fish) at up to 90°C/195 °F and until golden on the outside. Add your favourite smoking wood after 10 minutes for a nice aroma. They’re done when you can pull out the back fin very easily and can be served for example with toasted bread, salad and horseradish. They’ll keep in the fridge for max. 2-3 days.


The Backyard Rocket

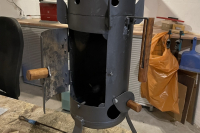
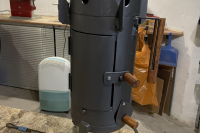
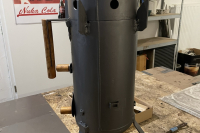
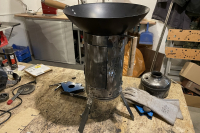
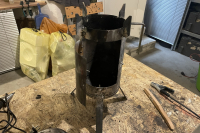
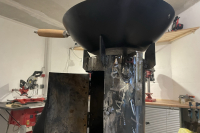
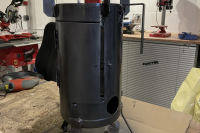
Formerly known as “Patio Oven and Wok Burner from an old Fire Extinguisher” – Part I and Part II 🙂

But, looking at it and observing it for while, I like “The Backyard Rocket” much better… I deem it finished so far and waiting for action. Unfortunately, work has me again and I didn’t have a chance of firing it up and have a shot at it, but I like the outcome so far and I will put it to use as soon as I can.


Patio Oven and Wok Burner from an old Fire Extinguisher (II)

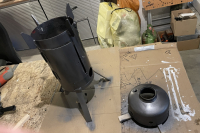
Next part of the burner is done. I took great efforts to fabricate four identical (okay, almost identical) pot holders and weld them in place correctly. Eventually, it worked and I’m proud that I achieved some ugly but correct welding lines instead of lining up separate spot welds.


By continuing to use the site, you agree to the use of cookies. more information

The cookie settings on this website are set to "allow cookies" to give you the best browsing experience possible. If you continue to use this website without changing your cookie settings or you click "Accept" below then you are consenting to this.

Close