Following the last two mushroom bags I made, I decided to eventually use up the leftover oyster mushroom spawn I was procreating then. It was sitting in a dry cool an dark place so I’m cautiously optimistic it might still be alive. This time, I wanted to try it with a straw growing substrate as shown in many internet publications and videos. So here’s a summary of what I did and in about a month’s time I hopefully can post an update on some progress.
The growing bucket
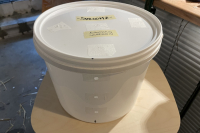
First, you need a growing bucket (in fact, you can use any container of suitable size (I’ve even seen a guy growing oysters in a pair of old sneakers), mine is a 10 l no-name vessel which seems sufficient to hold enough substrate. Clean the container thoroughly (I even spray-disinfected it), then carefully drill 4 sets of each three 9mm holes lnto the sides, as well as another set into the lid.
The bottom should receive a drainage hole, since at least in the beginning the straw will still be very wet and the exceeding moisture should be given a way to drain off to prevent sogginess. Tape the holes with Micropore™ tape in order to ensure sufficient gas exchange while keeping external spores and bacteria out, then close, label and set aside.
What did I do?
If your mycelium is older, alittle dried out and has been stored for a while, submerge it in cold, clean water for over night to increase the chance of reviving it. No need to do this with freshly bought or freshly grown mycelium.
Next, it’s about preparing the growing medium, in this case straw. It’s a natural material, most often stored under exposed conditions and full of microorganisms, so it has to be prepared a little for mushroom growing. If you buy your straw in the pet store, you’ll get much cleaner material but be cautious that it’s not been treated with any fungicides which would be detrimental obviously. You’re now going to pasteurize it:
This is not to be confused with sterilization. Both are thermal methods used in order to kill harmful microorganisms, but while sterilization is a process that destroys all microorganisms and their spores, pasteurization destroys only the vegetative forms of the bacteria and the spores survive. The latter should provide enough head start for the mushroom spores to colonize the substrate and establish dominance before competing organisms have a chance to do so.
Get yourself a large lidded container where you can fit all of your intended straw in, wash and rinse it and discard the water. Pour in enough boiling water to submerge at least three quartes of the straw, the rest will be treated by the hot steam, then cover and let cool down over night.
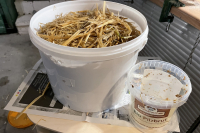
The next day, pour off the water and (squeezing out the straw as best as you can) stack first straw then some mycelium crumbles in alternating layers for three times. Top this with a final layer of straw up to just a few cm below the rim and close the bucket.
Proceeding
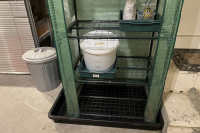
Now store your bucket in a dark place at about room temperature (15-22°C / 59-72°F), a little less is no problem but don’t go too high in temperature. Depending on the size of the bucket and the amount of substrate, colonization will take around 4-5 weeks. You can casually check for mycelium growth by lifting the lid a little. Make sure to put the bucket in a tray or similar, since some quite unappetizing liquid will drain from it in the first days.
When completely grown through and there are no molds or bad smells, you can give the substrate more light, cooler temperatures and more humidity to make them fruit. Ideally: 12-18°C / 54-64°F, 90% Rh and just enough light to read a newspaper (no direct sunlight). Provide enough air flow, so the little sprouting shroomz get enough oxygen and mist them regularly (once a day) with cold water.


